
Our house was built in 1789 by Jacob Osgood. Two of his sons built another house about 1/4 mile (0.5 km) behind us in the woods. The old road barely remains along our property line, but a cellar hole is all that remains of the home. Sometimes I really think about it and I find it really strange that people were living here 217 years ago, when the United States was just barely in existance.
There was no electricity here, the bathroom was more than likely a bedroom for young children near the master bedroom, the water well we have may well be original. I am curious where the outhouse might have been!
The Osgoods, as far as I can tell, owned a fairly large piece of land here, but for reasons yet unknown, the property at least in the early 1900's was reduced to only 2 acres. Why is unknown as I haven't researched the deed records prior to 1900 yet. There are stone walls, probably for holding sheep, that go for miles behind and around us. Some of these are up steep hills. The work these people did (even if they had help with oxen) is incredible.
The 2 acres we have is on rolling property, best characterized as a boulder farm. We live at the base of the Mink Hills, and centuries of rain and frost have done their job at bringing huge granite boulders to our property. Still, it is a lovely location. We frequently see 10 or more turkey in the neighborhood, there are signs of deer around us, and last year I spotted a black bear (not a Newfoundland dog as I thought at first glance) running (well, lumbering is more like it) up the road. Our nearest neighbor at 200 feet (70 meters) across the street can barely be seen, and our next nearest neighbor is 500 feet (160 meters) away down the hill. There is no room for another house between us, and the other two sides of the property is conservation land owned by the town of Warner, which also cannot be developed. This conservation land goes for miles behind us into the Mink Hills. For a satellite view, click here. Our house is the one in the center of the picture, on the south side of the road (right next to the road, at about a 45 degree angle). If you zoom out, you'll see all the land next to it. It's very quiet and peaceful. And it's only 1.5 miles (3 km) away from a big grocery store and (importantly to this project) the hardware store.
When we bought the house in 2004, it was in need of serious repair. The first job was the bathroom, which was literally falling into the basement. A complete gutting was needed, which made for some interesting few days without a shower, but obviously the worst was no toilet for 3 days while I shored up the rotted floor joists and added 2 layers of 3/4 inch plywood. Thank God for McDonald's down the road (next to the hardware store!). Only the master bedroom had any insulation in the house, so that was the second room to get something to keep the -20F (-30C) chill out of the house.
Next came my den. OK, it was selfish, but I need my toy room for my computer, ham radio, recording "studio" and other electronic nerd goodies. This used to be a storage room between the breezeway off the kitchen and the small barn. That was completed in the summer of 2005, and I had pretty much had enough of renovation. Time for some serious outside work! We live on the north side of the hills, so some sunlight (and free firewood) was in order.
So as the winter of 2006-2007 started approaching, I was ready to get the living room done, where we spend most of our time. Some insulation in there would be very welcome! The biggest problem with the living room is it is loaded with wood. Wood wainscotting, wood windows, wood floor, wood doors, wood door casings. Sounds wonderful except someone painted every single wood surface in there. I hate painted wood. All that beautiful antique wood covered in boring beige paint. So a lot of stripping and sanding would be in order. A lot of work, but I knew the end result would be outstanding.
So my son just this weekend asked (half-jokingly) wouldn't it be easier to just to tear the whole house down and put up a new one. Well, yes. There's a number of reasons I could never do this. Mostly, this house is a piece of history. Somebody used a lot of effort to put up this house, and they did it very well. There's issues with the house, but the basic foundation and structure of the house is rock solid after all those years. To me, it would be an insult to the Osgoods to tear down all their work just for ease. Secondly, I am a Yankee. For those who don't know what this means, we don't like throwing away anything that is useful or might be of use later, and we'd rather do the work ourselves than pay someone else. We don't refer to ourselves as cheap, we are frugal. Somehow that sounds better :-) Time is money? No, my time is free! Materials are extra...
Finally, putting up a new house is expensive. I'm not that rich...
Sorry - I did want to share what I love about this place. So here we go.
Click on a thumbnail picture to see a larger image.
|
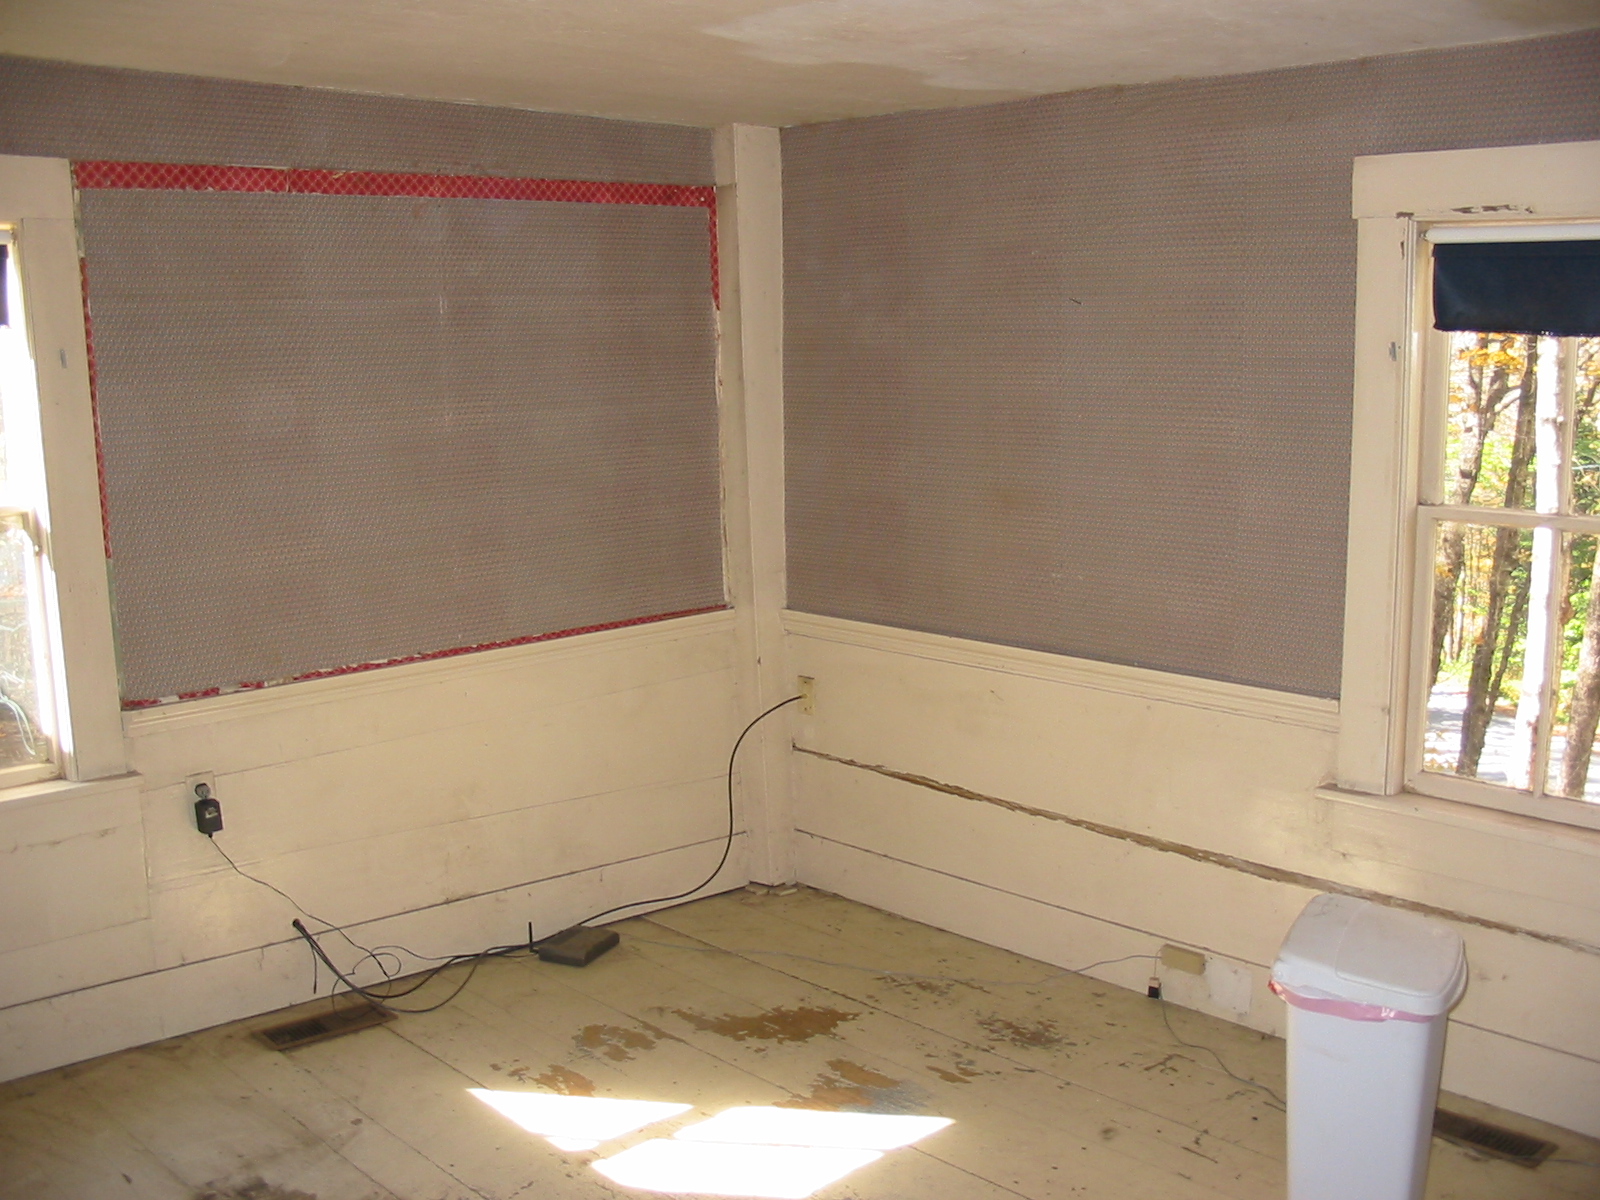
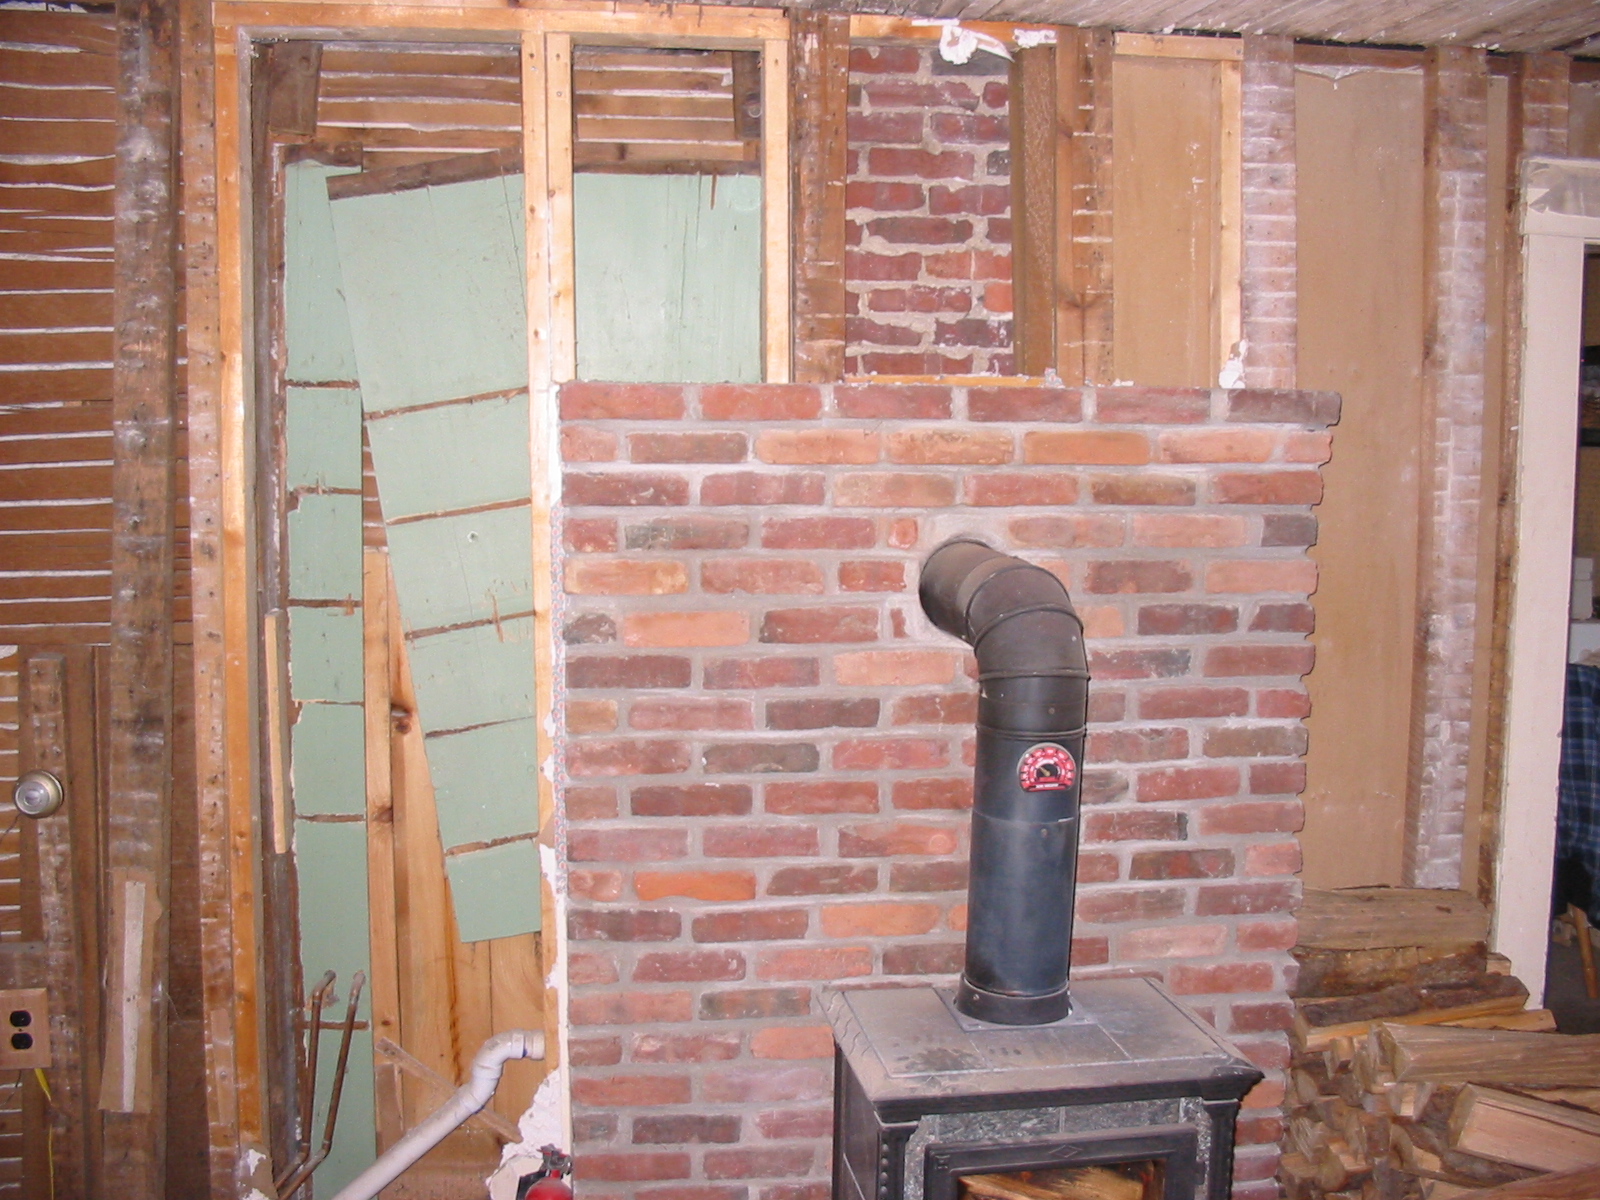
Looking west. The woodstove is on the left. The brick is new work - there's 3 layers of sheet rock behind it. The Crowbar of Destruction is at the ready. Red horrific wallpaper is exposed near the top. Paint, paint everywhere! |
|
Northwest. |
|
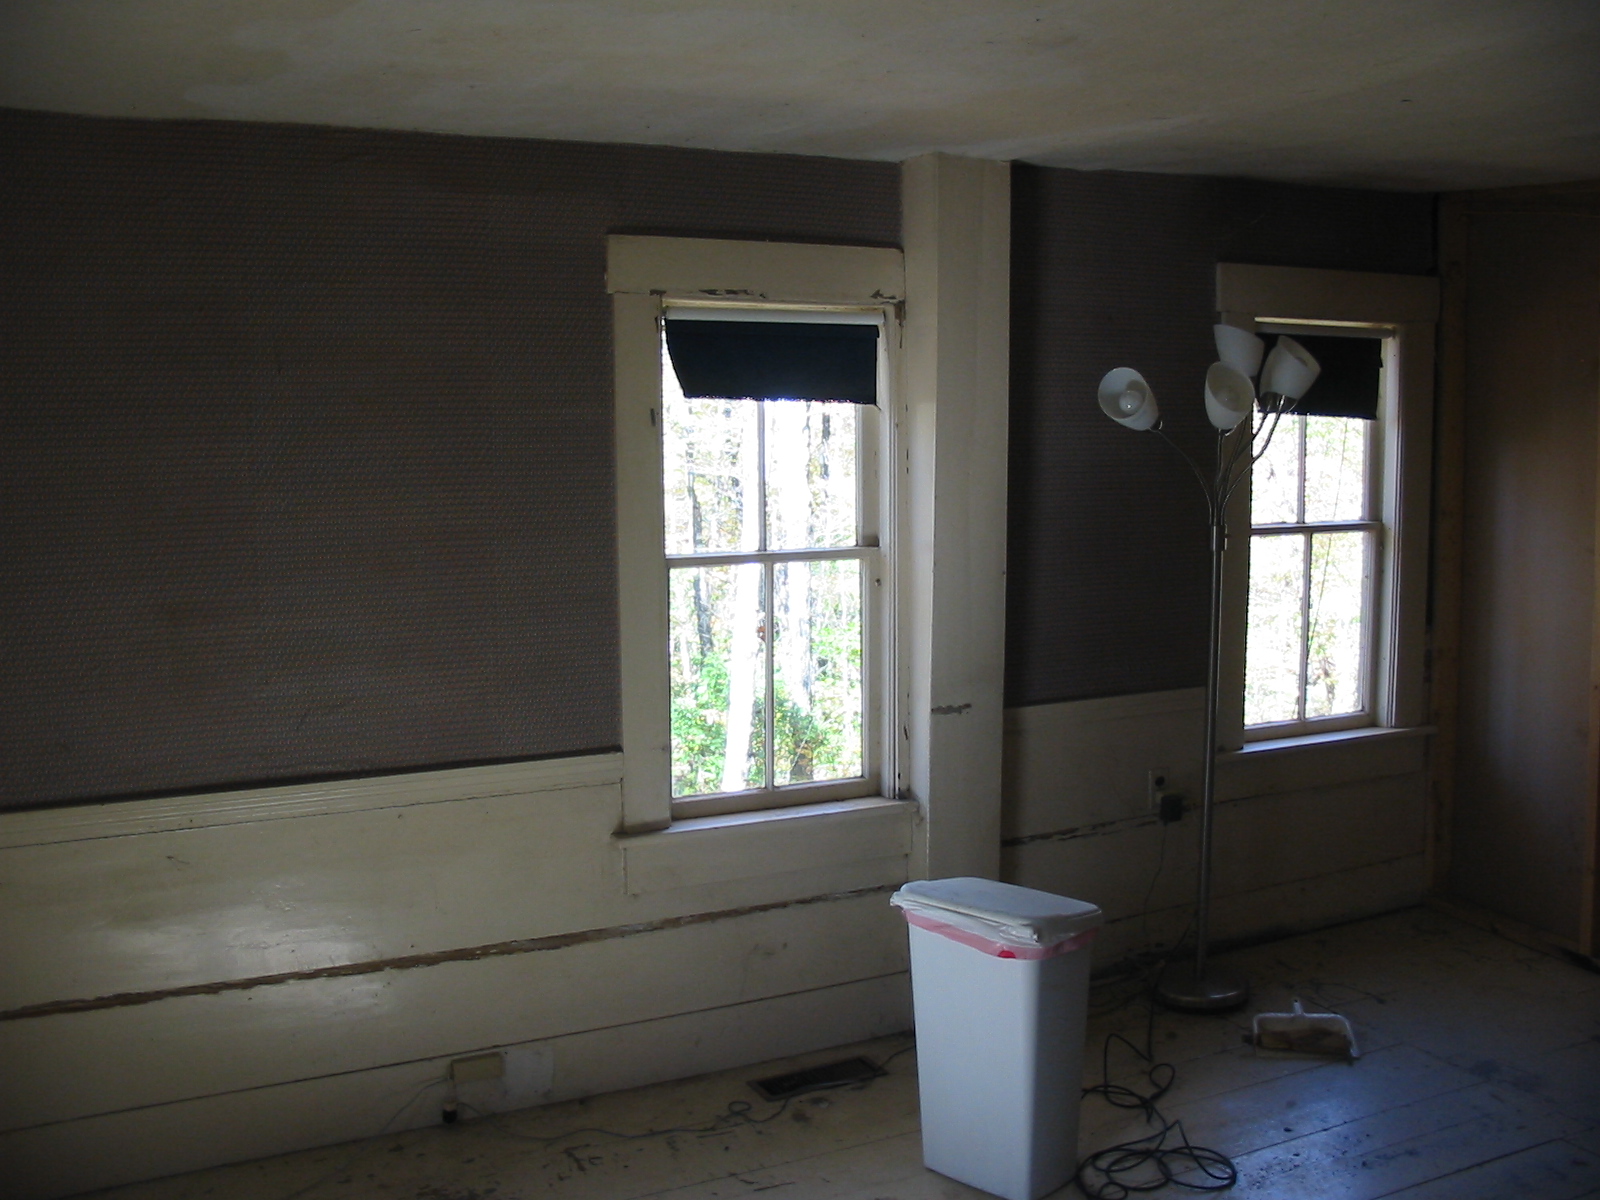
North. The wood to the right of the window covers one of the large wood support beams. After over 200 years, the wood is nearly petrified. Well, enough so to bend 16p nails... |
|
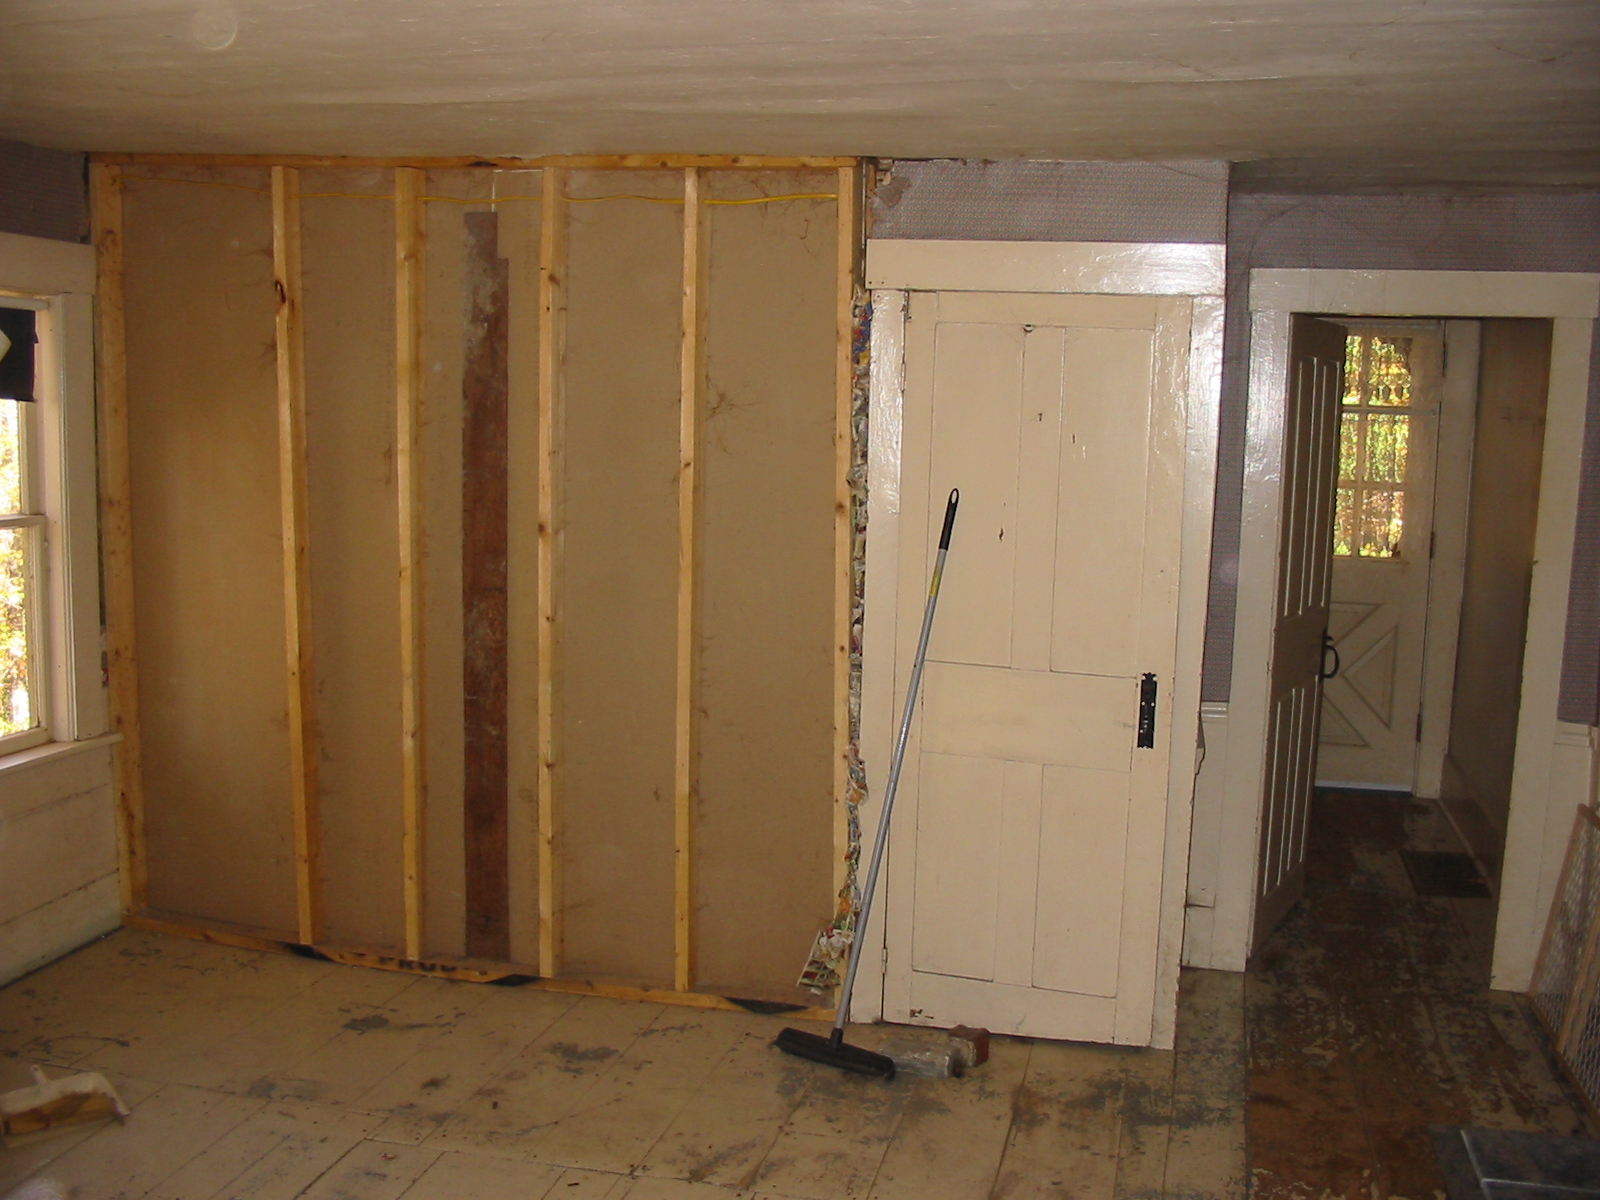
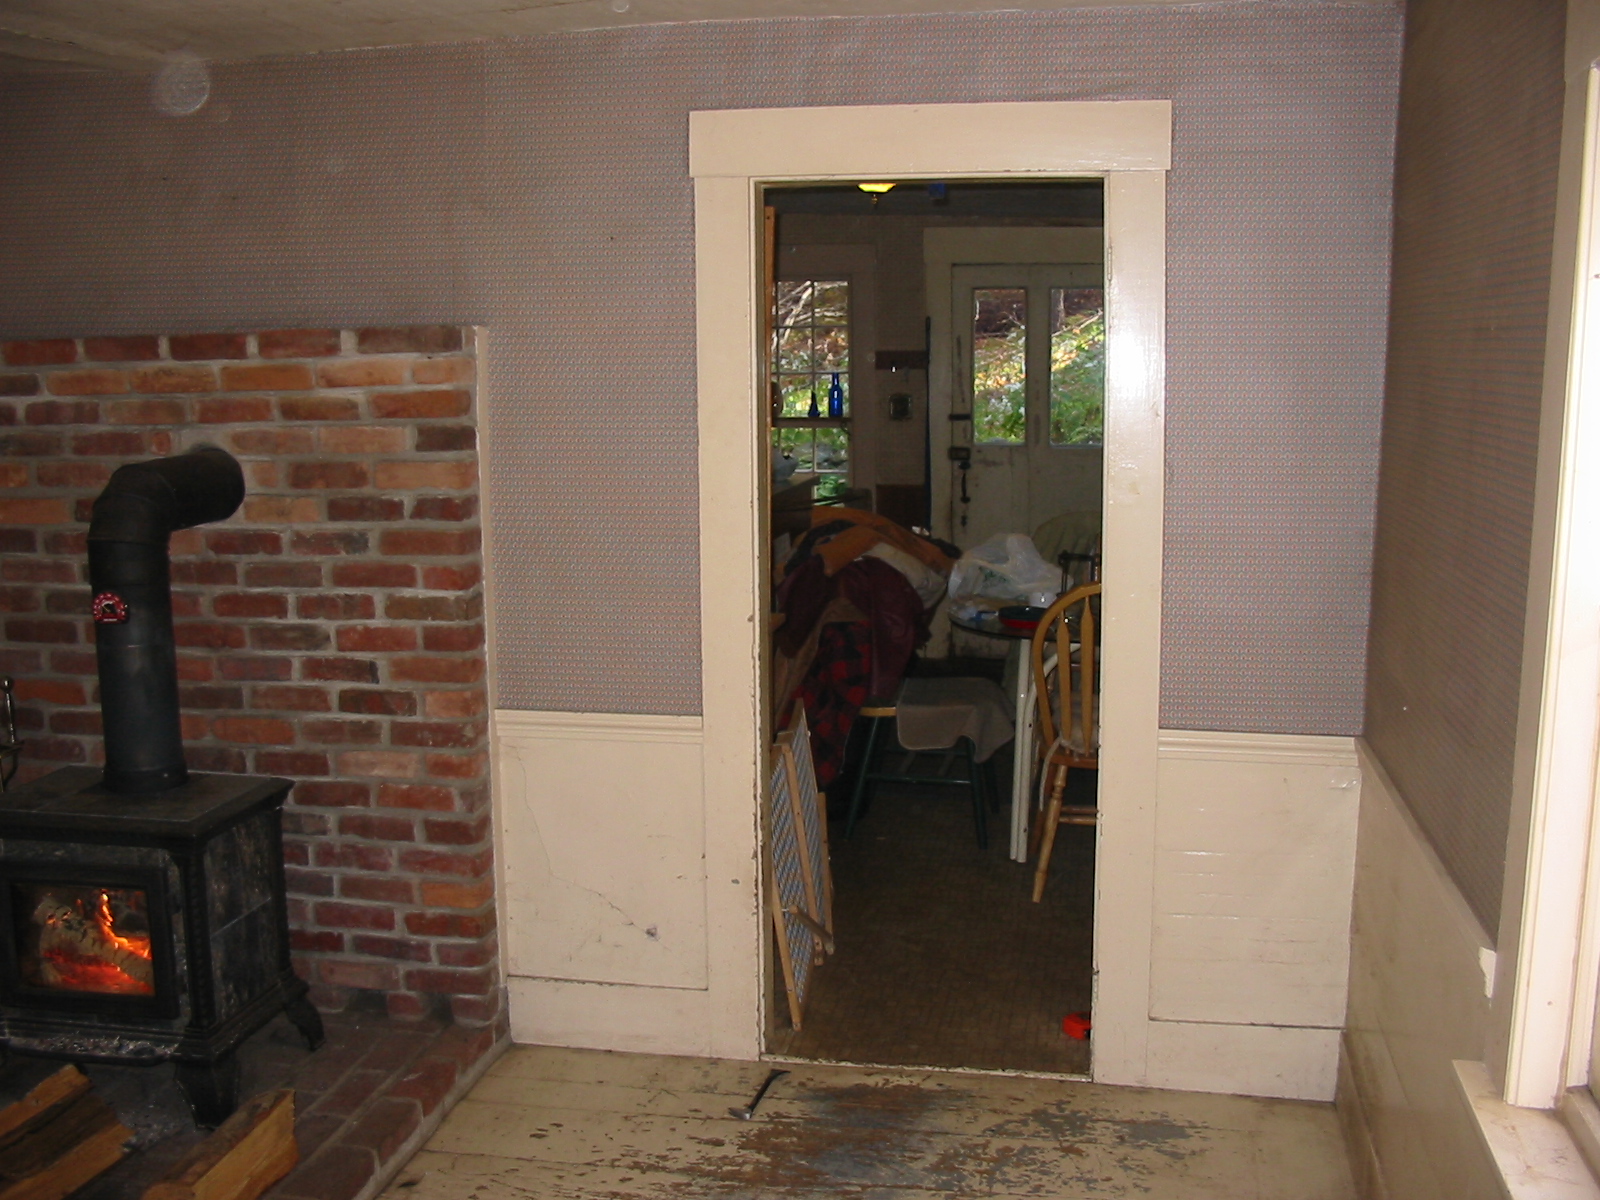
East. On the other side of the wall is the renovated bathroom. The doorway on the right is the front entryway (the front door is visible). The door on the right goes to the basement (more paint to be removed!). Just to the left of that used to be a door into the bathroom. Again, my suspicion is this was a small bedroom, most likely an infant's room near the parents' room. |
|
Northeast. The master bedroom is the door on the right. Here you can really see how I messed up the basement door when I did over the bathroom. The door got knocked out of level (not that anything is really level here). Newspaper was the insulation of choice to keep the basement air out. Hey, it worked. |
|
North. Looking into the kitchen. |
|
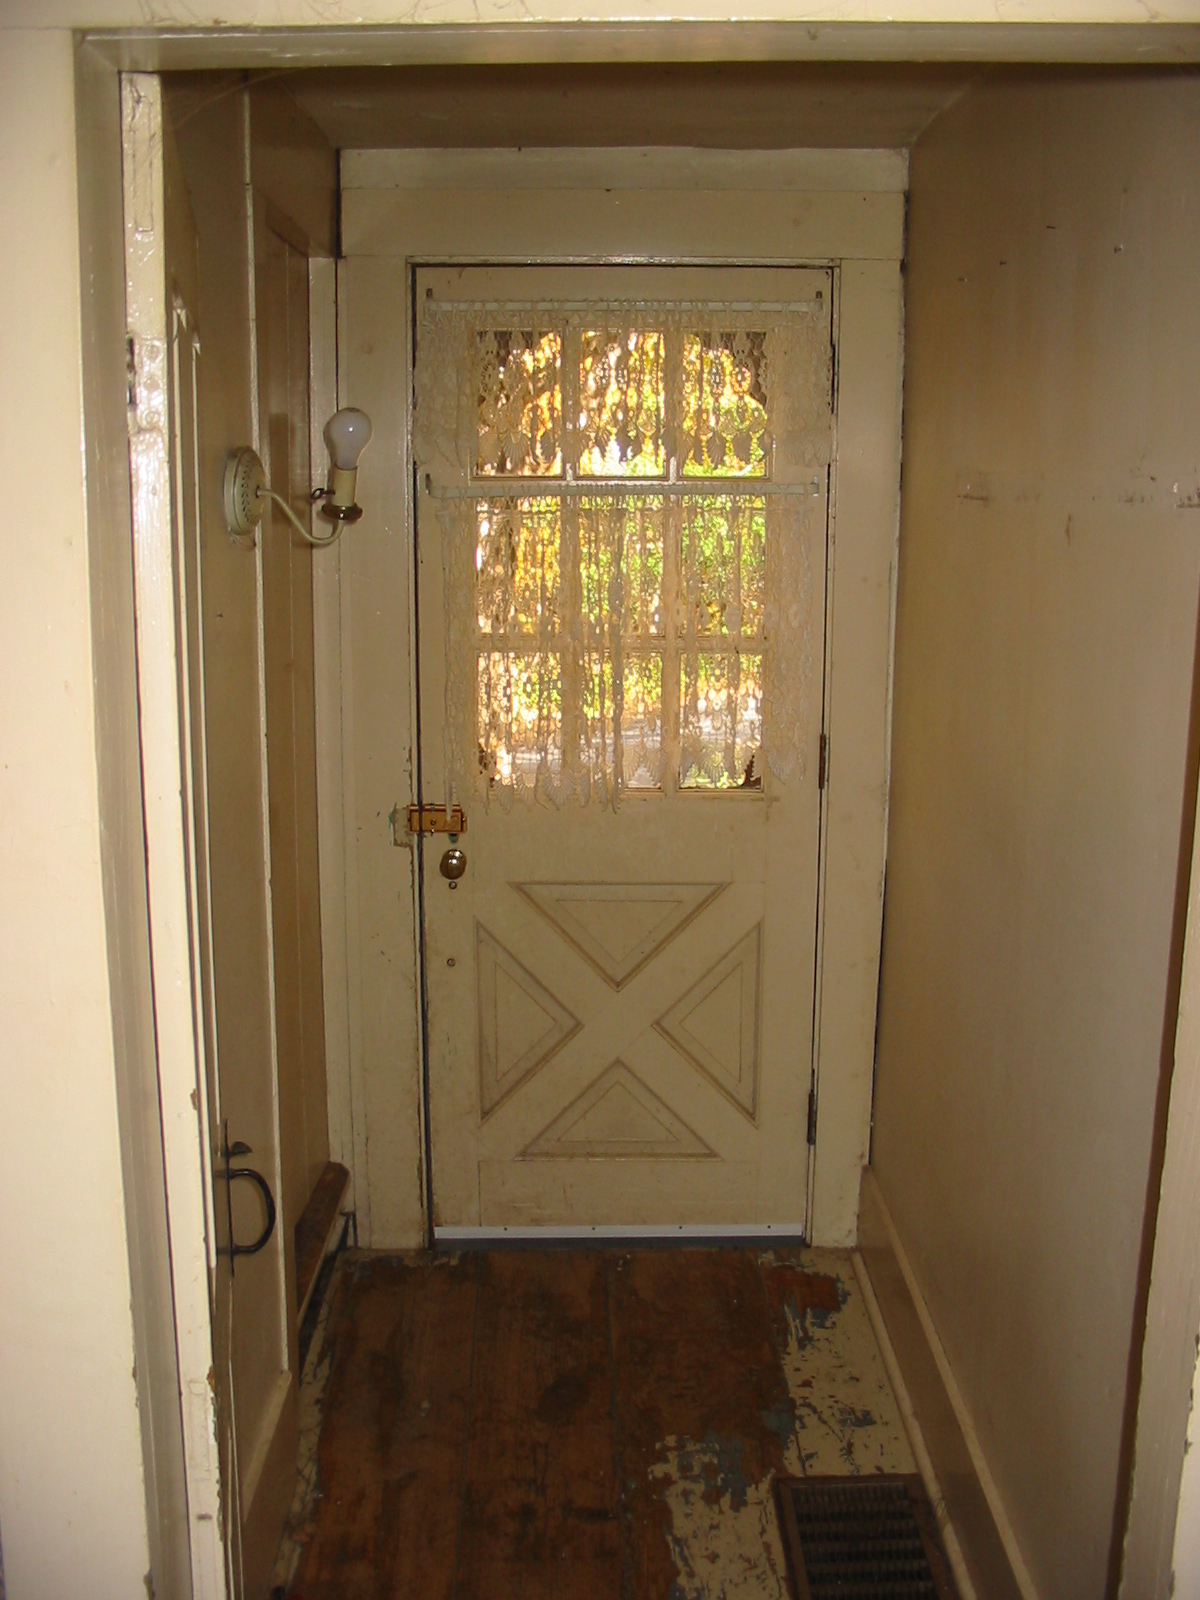
Entryway. The light on the right is barely held up by a nail. The floor is partially stripped. This was my "test piece" to see the quality of the wood underneath. |
|
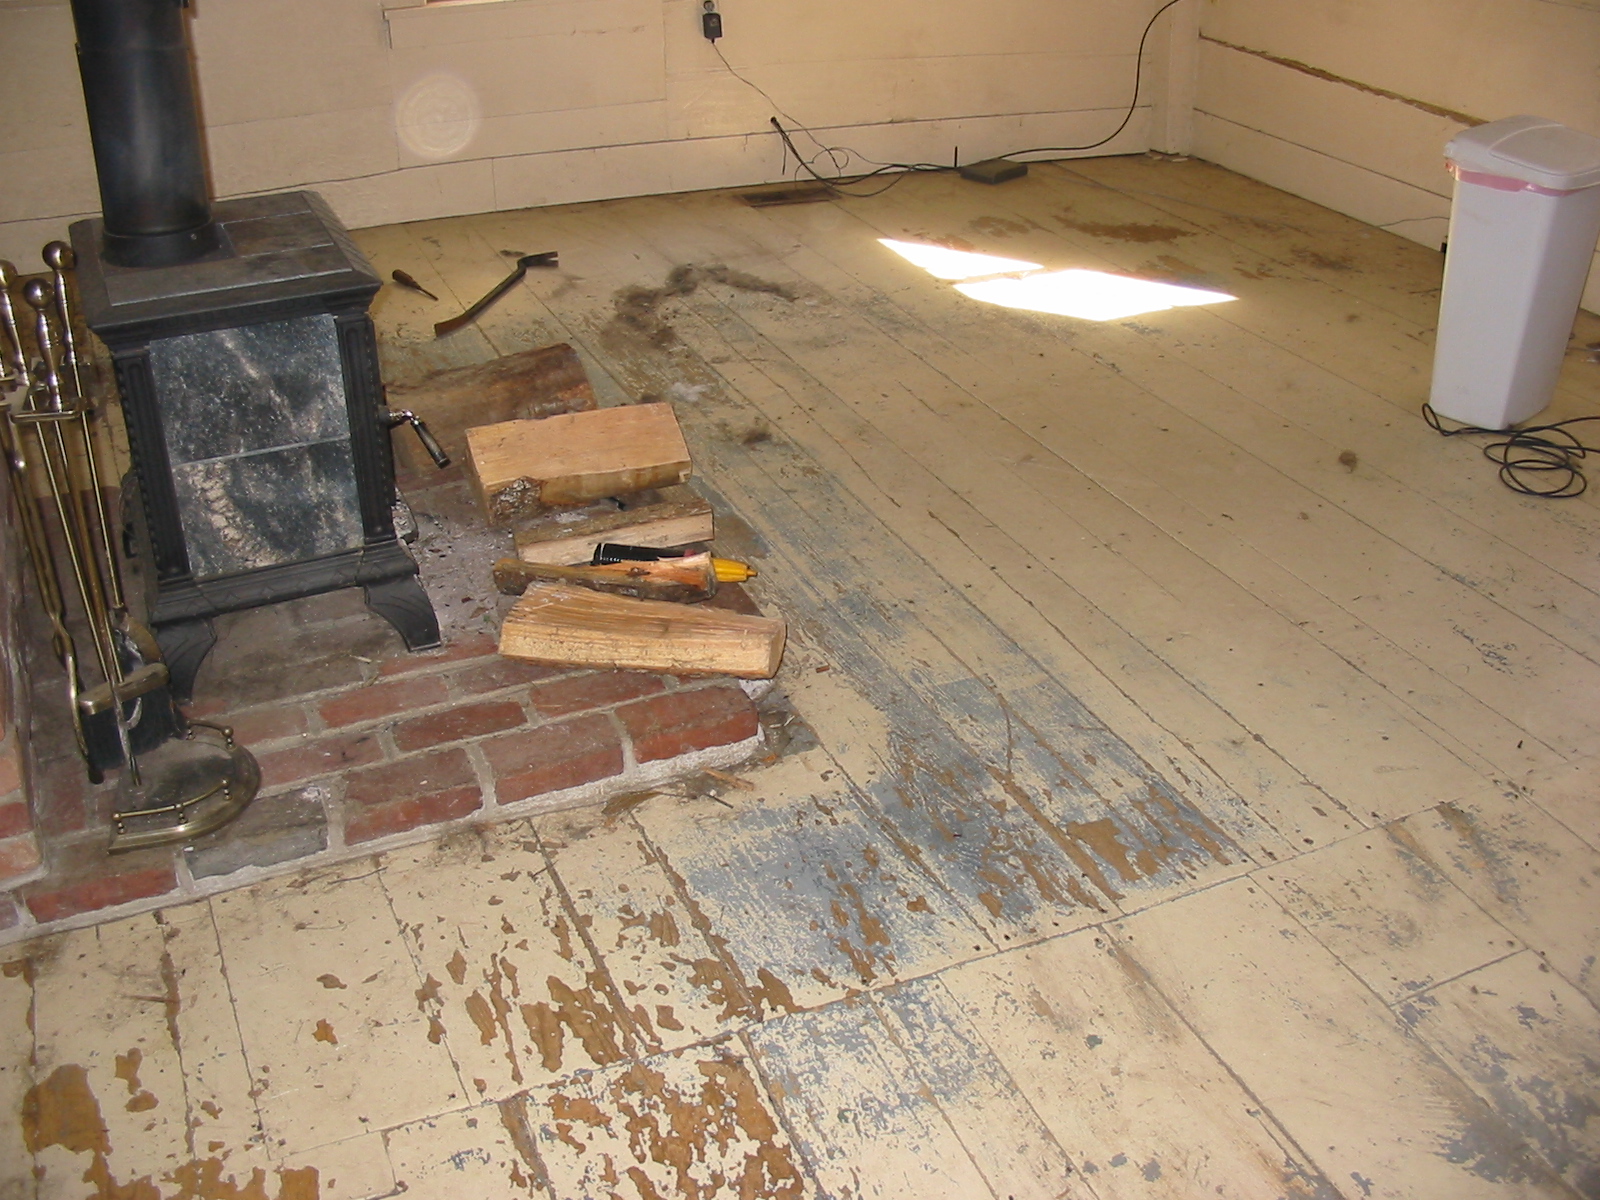
The floor. These are wide plank floors, typical of the era. You don't see these in modern houses. |
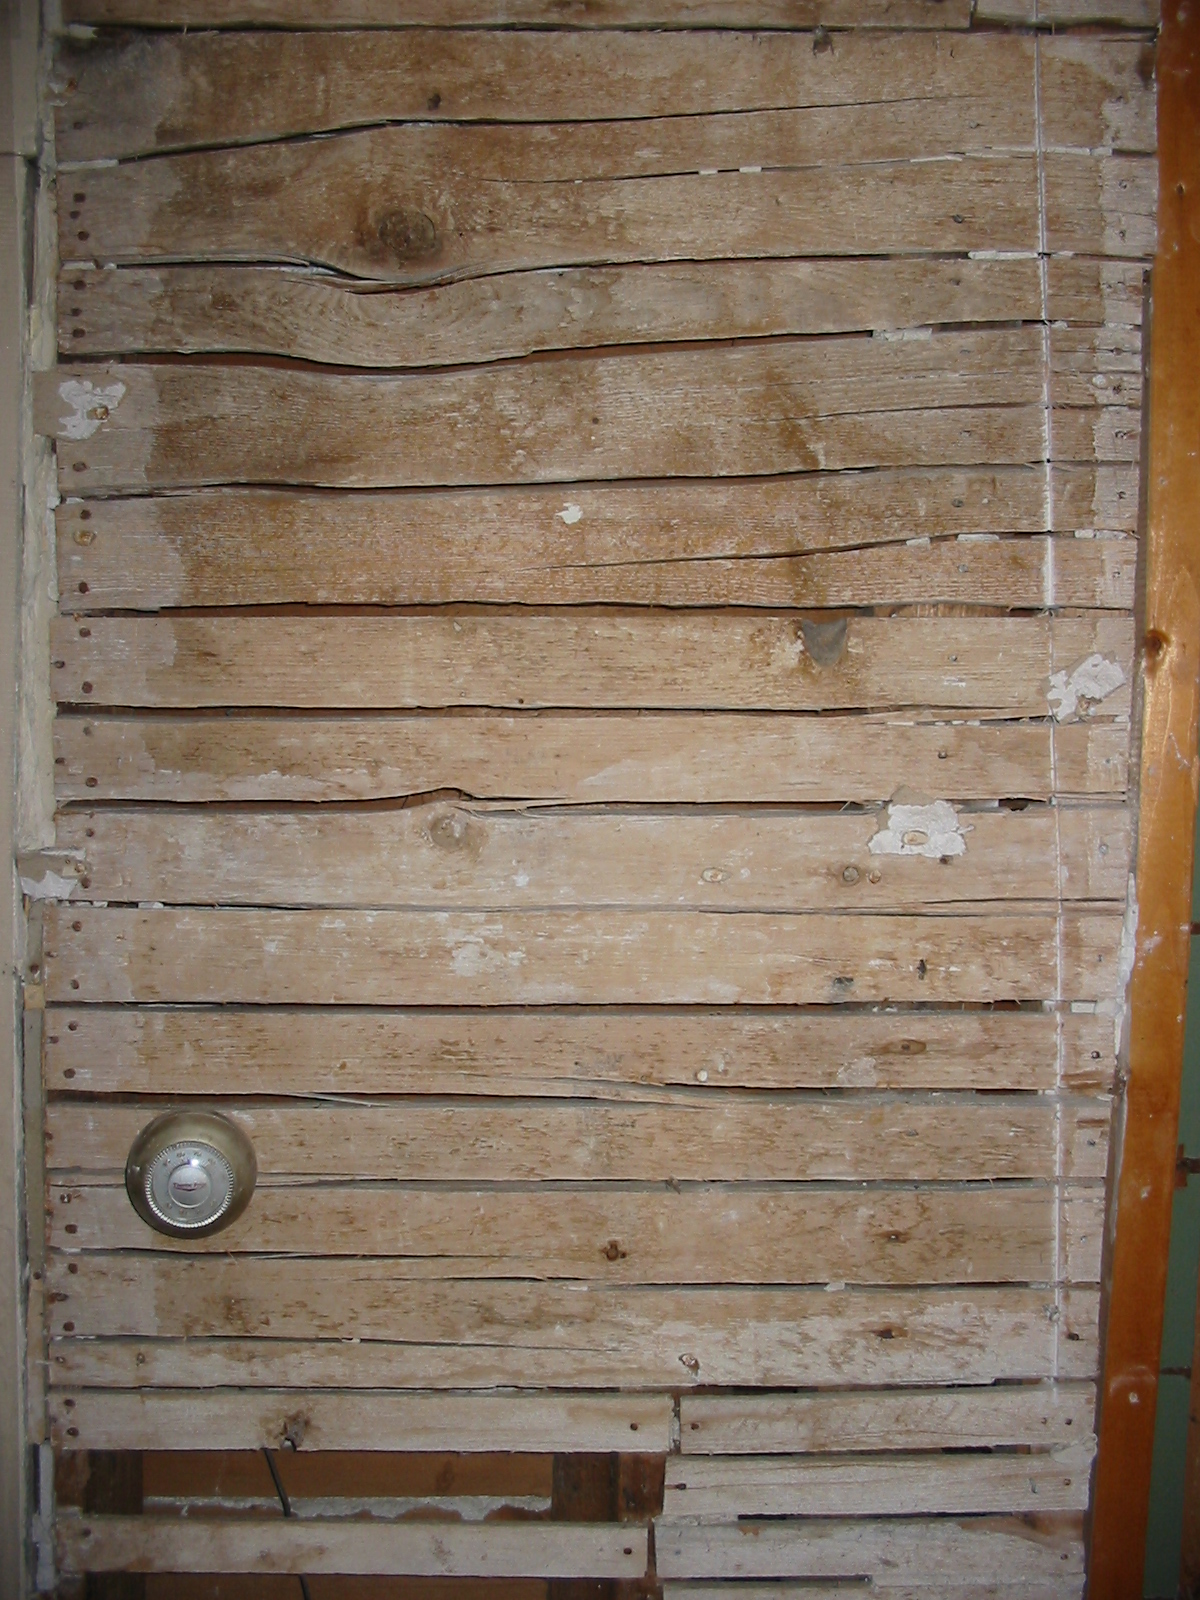 |
This is probably the original lathing. Lathing is wood with gaps. The plaster is applied over the lathing, and it flows into the and behind the cracks, holding the plaster in place. If you look carefully, you can see this lathing is actually boards that have been split alternatively on each end several times. |
 |
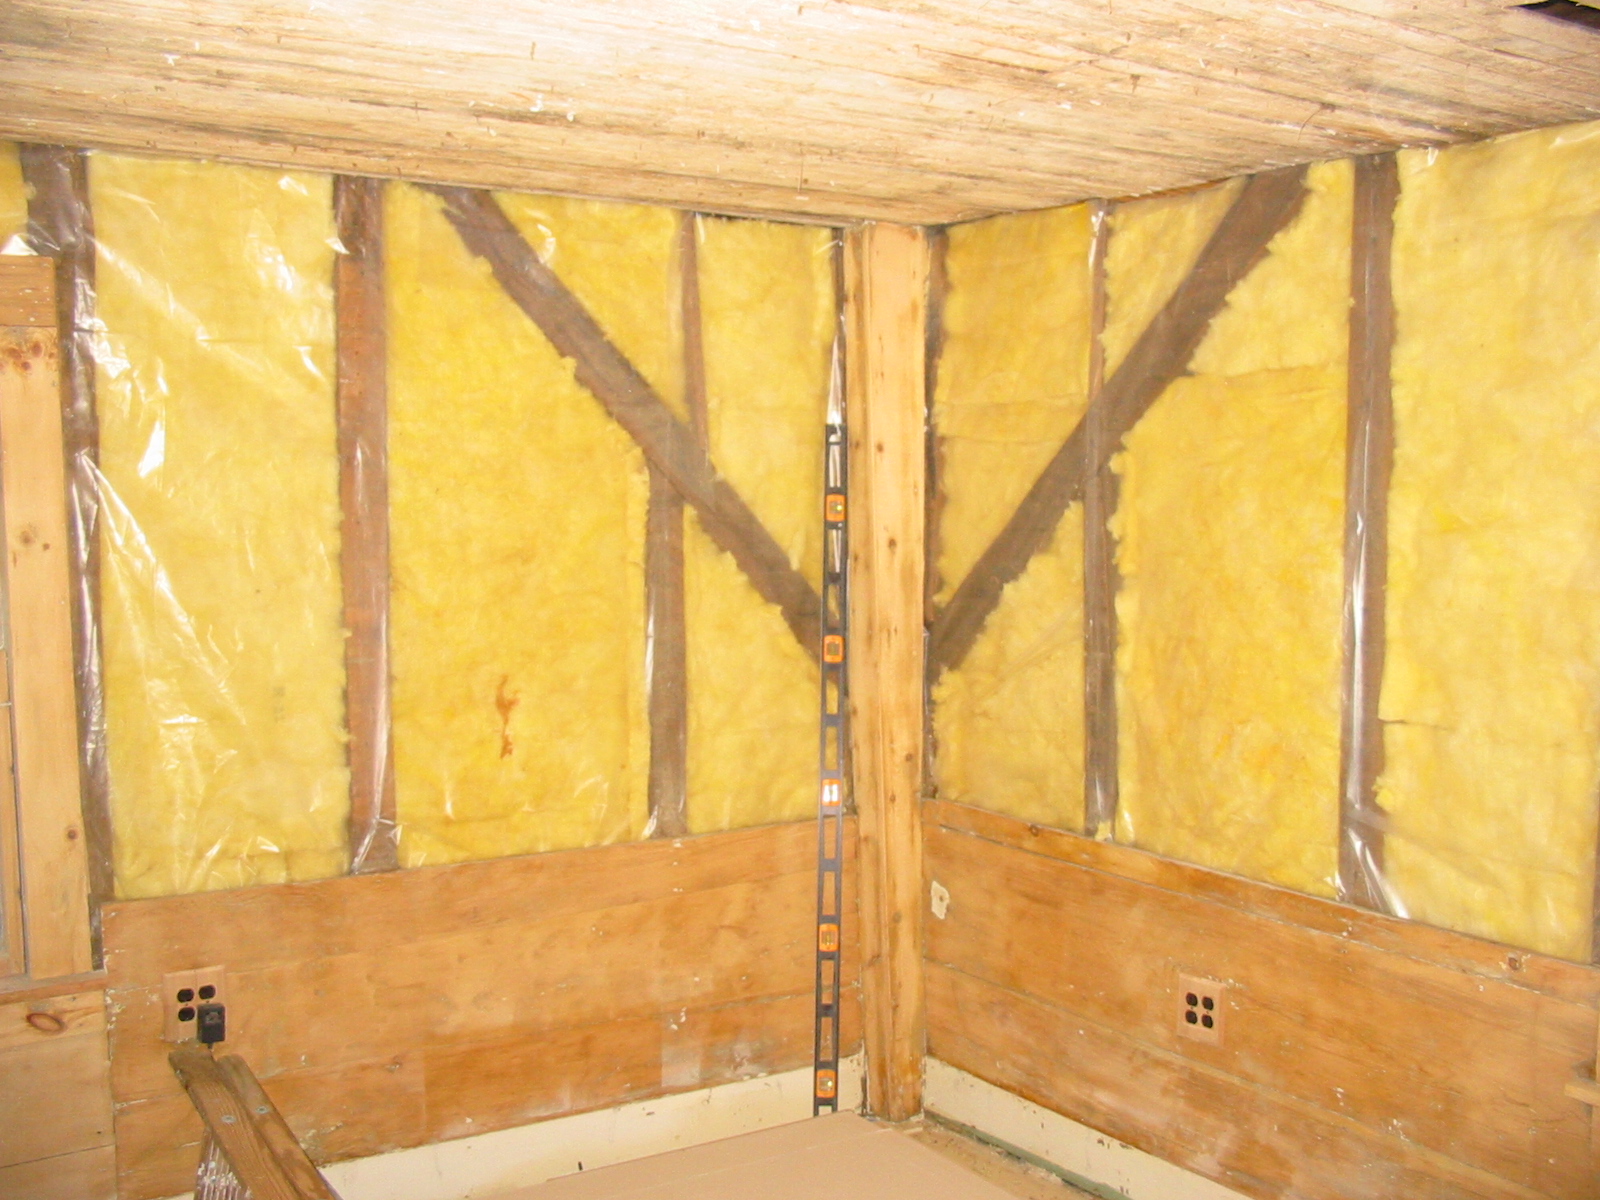
Northwest. A pile of lathing is on the floor. This had to be taken out on the walls to put in insulation. In the left side of the corner on the diagonal beam two mouse nests can be seen. I found a lot of these in the framing. For scale, the diagonal beams are about 5 inches (13 cm) thick. |
 |
Southwest. The plastic is over the doorway to the kitchen - trying to keep the dust out! In the corner, you can see newer lathing (manufactured 1 inch (2.5 cm) boards). The things hanging down from the ceiling are years (centuries?) of accumulated dust. I opted to leave the ceiling lathing on because it would make hanging the sheet rock on the ceiling a LOT easier. The sheet rock is 8 x 4 feet and the upstairs floor joists are spaced about every 26 inches or so. That either involves a lot of cutting sheet rock or a lot of extra framing. No thank you. |
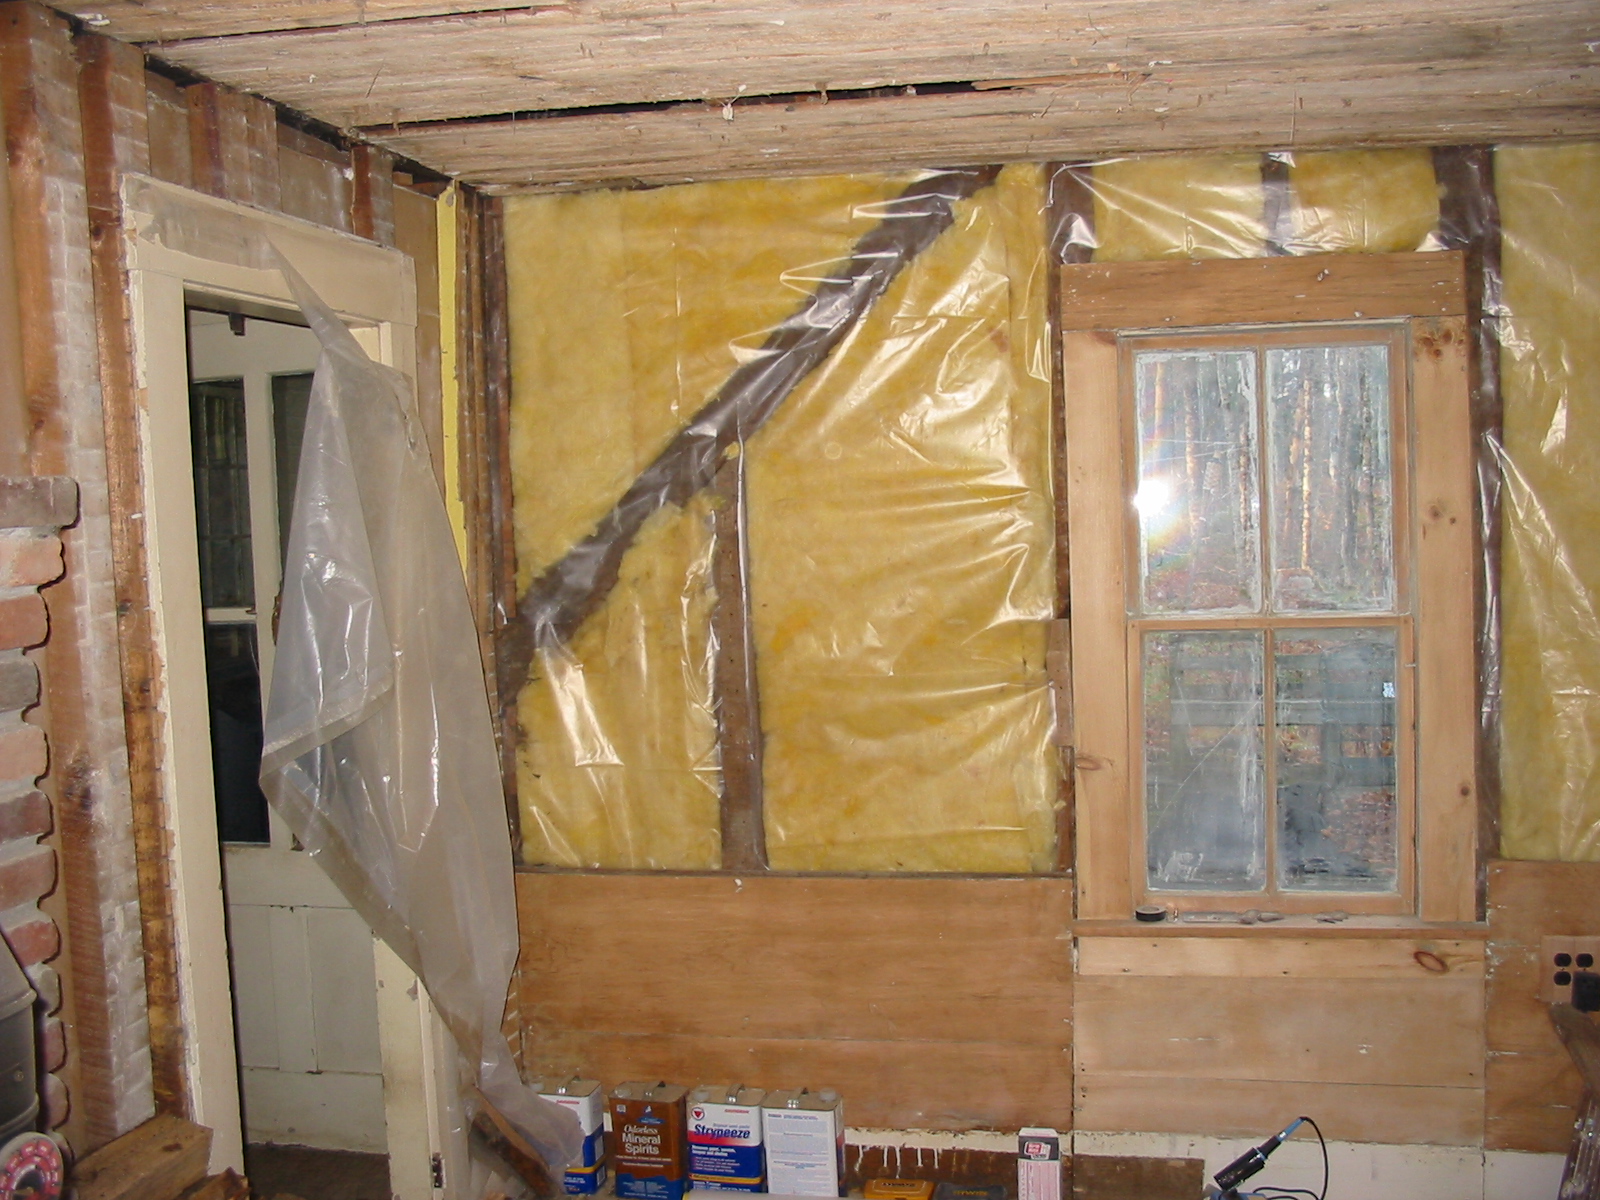 |
Southwest. Lots of changes. First - INSULATION! The wainscotting and the window have gotten a rough sanding. All the white spots are dents that got filled in when it was painted. I'll have to dig them out and fill with wood putty. The wainscotting under the window is not original. Not sure why this was done, although along this wall there was a thing strip of insulation along the bottom of the wall. I'm not sure why they only did the bottom strip. 3 gallons of wood stripper are lined up on the floor. It works OK after several coats, but I'm preferring the heat gun at this point. The only thing I don't like about the heat gun is old dry wood and intense heat. Fire has always been my most intense worry here. Fortunately, I found a good setting right away for gun with no worries about torching the place. I'm still learning. The plastic is vapor barrier to keep moisture from rotting the wood. |
 |
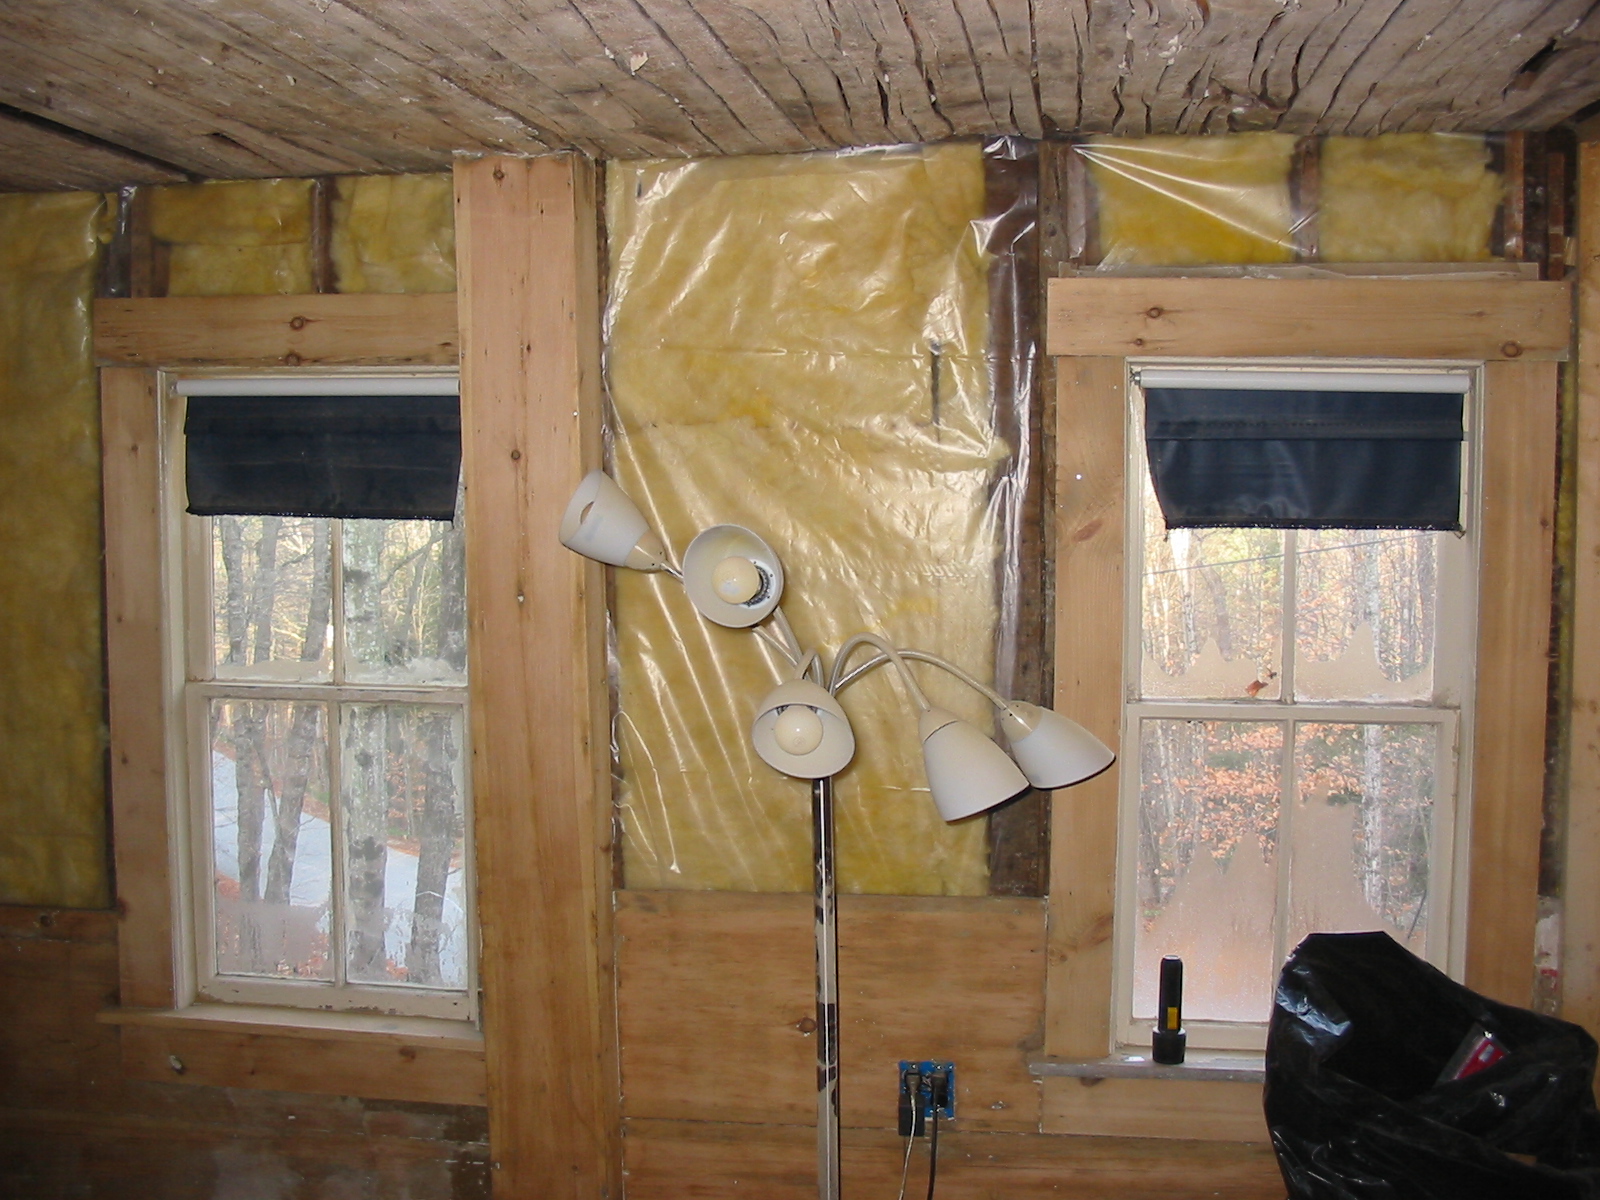
Northeast. Besides the nice, fluffy, warm insulation (what a difference it's made it how warm the living room is), the other big thing for me is 8 electrical outlets! There was only 2 outlets in the whole room before (4 receptacles total). With a TV, DVD player, Sega system, VCR, stereo receiver, floor lamp and telephone - this was a stretch. The outlet on the left was there before but has been upgraded to 4 receptacles. The outlet on the right is new. It was so much fun installing these two. The old wiring was the cloth sheath type with some serious frays exposing the wires underneath. Again, scary since fire here terrifies me. All gone now. Unfortunately, the living room is over a crawl space (only the master bedroom, entryway and bathroom are over a full basement). I don't like small spaces but I didn't have much choice. I am soooo glad that's done. I now have 18 total receptacles. Unfortunately, even this isn't up to the electrical code (sorry Dan - I tried). In the picture above, there should be an outlet on that wall, but there's was no way I can get into there without getting out a shovel in the crawl space or tearing out (and probably ruining) the wainscotting. |
 |
North. |
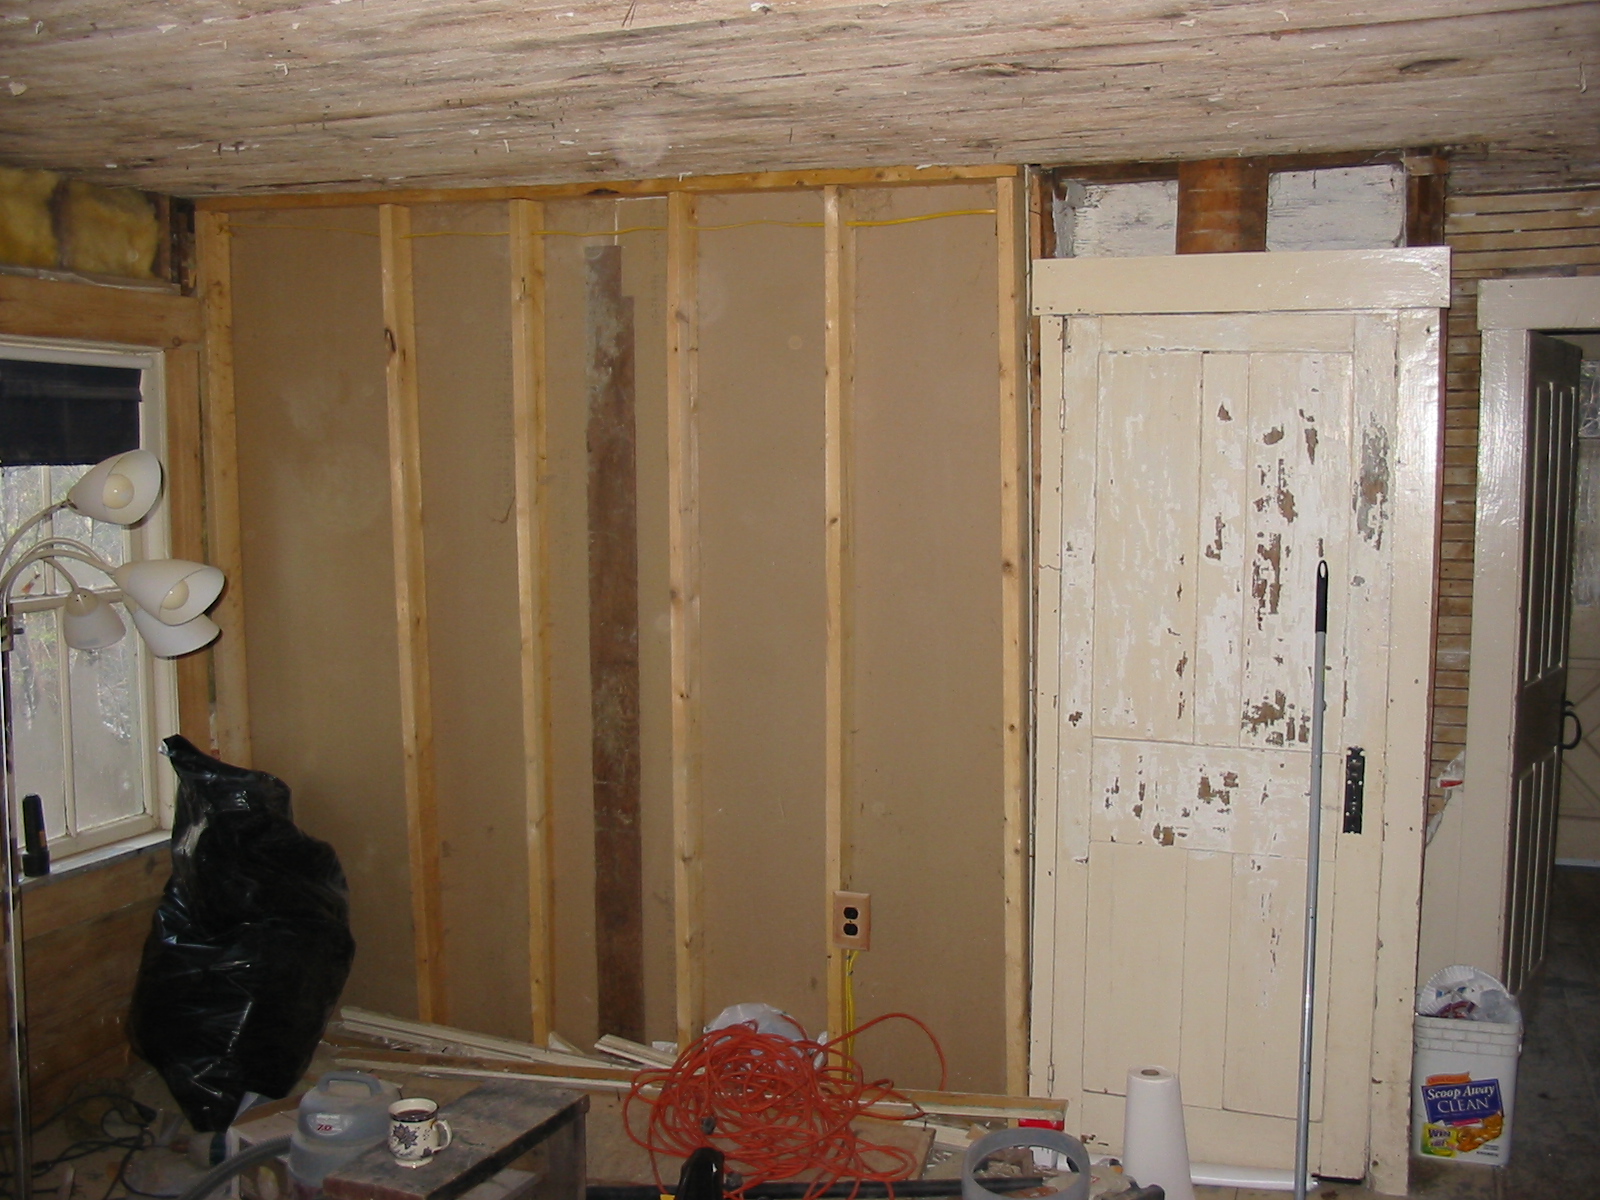 |
East. Nothing much new here except a little stripping done on the basement door and another new electrical outlet. Oh, and the basement door is now perpendicular to earth's gravity. Unfortunately, it's not parallel to the studs in the bathroom. I've only found one square corner so far. One. |
 |
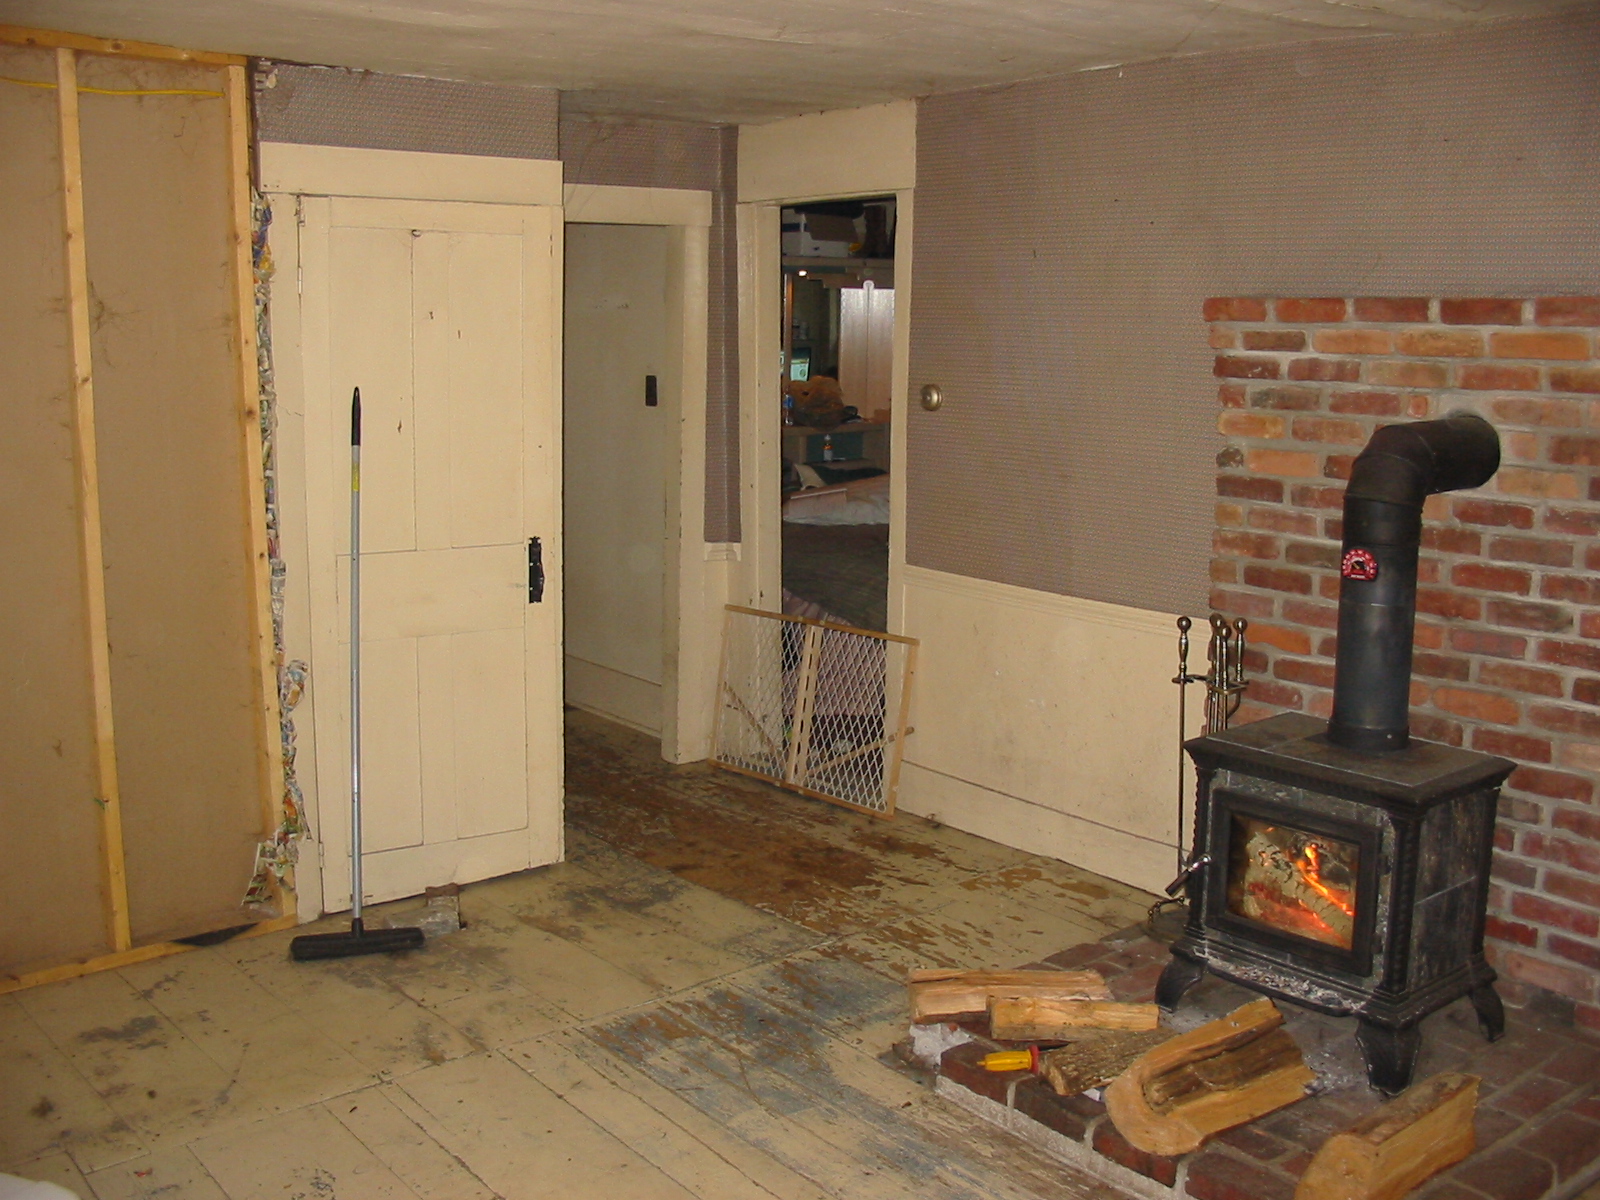
Wood stove area. Some goofy plumbing to the washing machine in the kitchen (not mine!). Wood is our primary heat (about half the cost of oil). This soapstone stove is very small (17 inch / 43 cm), but it's very efficient. It has no problem heating up the place even with no isulation. The problem is buying wood small enough to fit. I prefer to cut my own. Resplitting bought wood sucks. |
The ceiling is about halfway done with sheet rock. I'll send out another email when more pictures are available.
Hope you enjoyed!